opencv源代码中包含了dft的demo,但没有使用cuda的demo。下文会简单给出一个cuda例程,并进行简单的高频滤波。
为方便说明,将程序分成了若干部分
1.头文件
#include <iostream>

#include <opencv2/core.hpp>
#include <opencv2/imgcodecs.hpp>
#include <opencv2/imgproc.hpp>
#include <opencv2/core/cuda.hpp>
#include <opencv2/cudaarithm.hpp>

using namespace cv;
2.导入图片加载到GPU,为简单使用了单色图
int main()
{
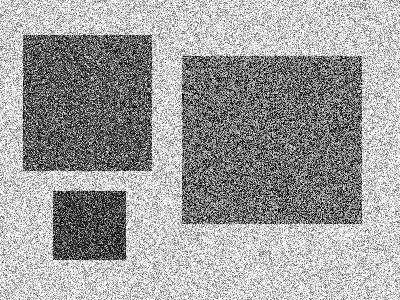
Mat img = cv::imread("pic2.png",ImreadModes::IMREAD_GRAYSCALE);
cuda::GpuMat *in_mat = new cuda::GpuMat();
in_mat->upload(img);3.扩展图片到合适大小 并进行 傅立叶正变换,参考了opencv源码中的代码
	cuda::GpuMat padded;                            //expand input image to optimal size
	int m = getOptimalDFTSize(in_mat->rows);
	int n = getOptimalDFTSize(in_mat->cols); // on the border add zero values
	cuda::copyMakeBorder(*in_mat, padded, 0, m - in_mat->rows, 0, n - in_mat->cols, BORDER_CONSTANT, Scalar::all(0));
	cuda::GpuMat padfloat;
	padded.convertTo(padfloat, CV_32F);
	cuda::GpuMat zeromat(padded.size(), CV_32F);
	zeromat.setTo(Scalar(0));
	cuda::GpuMat planes[] = { padfloat, zeromat };
	cv::cuda::GpuMat complexI;
	cuda::merge(planes, 2, complexI);
	cuda::dft(complexI, complexI, complexI.size());            // this way the result may fit in the source matrix . complexI 为变换后的实部与虚部
4.高频滤波
opencv源码中的demo交换了频谱的四个象限,我这里就不进行交换了,所以需要保留的低频区域在四个角上,而不是在图像的中心
	const int mask_w = 150; //设置保留图像四个角的椭圆区域大小
	const int mask_h = 100; //
	Mat mask(padded.rows, padded.cols, CV_8UC1, Scalar(255)); //画图只能在cpu上做,故建了一个Mat
	cv::ellipse(mask, RotatedRect(Point2f(0, 0), Size2f(mask_w, mask_h), 0), Scalar(0), -1);
	cv::ellipse(mask, RotatedRect(Point2f(0, mask.rows), Size2f(mask_w, mask_h), 0), Scalar(0), -1);
	cv::ellipse(mask, RotatedRect(Point2f(mask.cols, 0), Size2f(mask_w, mask_h), 0), Scalar(0), -1);
	cv::ellipse(mask, RotatedRect(Point2f(mask.cols, mask.rows), Size2f(mask_w, mask_h), 0), Scalar(0), -1);
	cuda::GpuMat gpumask(mask);
	complexI.setTo(Scalar(0, 0), gpumask);//将高频区域设置为0
5.可视化频谱图 (看看而已,非必须)
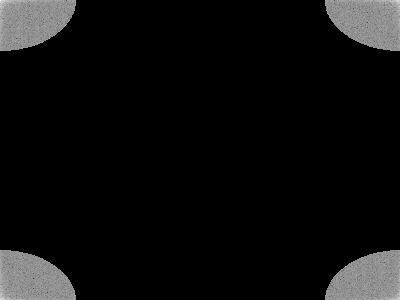
	cuda::split(complexI, planes);                   // planes[0] = Re(DFT(I), planes[1] = Im(DFT(I))
	cuda::magnitude(planes[0], planes[1], planes[0]);// planes[0] = magnitude
	cuda::GpuMat g_magI = planes[0];
	Mat magI;
	g_magI.download(magI);
	magI += Scalar::all(1);                    // switch to logarithmic scale
	log(magI, magI);
	// crop the spectrum, if it has an odd number of rows or columns
	magI = magI(Rect(0, 0, magI.cols & -2, magI.rows & -2));
	normalize(magI, magI, 0, 255, NORM_MINMAX); // Transform the matrix with float values into a
	imwrite("magi.png", magI);
6.反傅立叶变换
	cuda::GpuMat inverseTransform;
	cuda::dft(complexI, complexI, complexI.size(), cv::DFT_INVERSE);
	cuda::split(complexI, planes);
	planes[0].rowRange(0, in_mat->rows).colRange(0, in_mat->cols).copyTo(inverseTransform);
7.归一化,并保存滤波后的图片
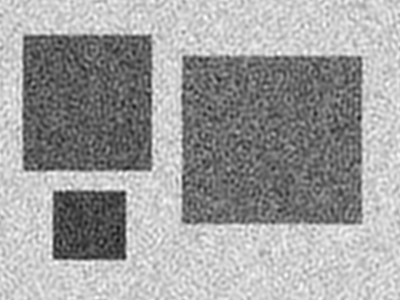
	double minval, maxval;
	cuda::minMax(*in_mat, &minval, &maxval);
	cuda::normalize(inverseTransform, inverseTransform, maxval, minval, cv::NORM_MINMAX, CV_8UC1);
	//cuda::normalize(inverseTransform, inverseTransform, 255, 0, cv::NORM_MINMAX, CV_8UC1);
        //网上很多代码使用的是上面一段,归一化到0-255,但这样有时会大幅改变图片的整体亮度,故我这里使用了原图的最大,最小值进行归一化
        //或者采用cv::DFT_SCALE标志,会实现自动归一化到原来的尺度而不需要单独进行归一化
        //cuda::dft(complexI, complexI, complexI.size(), cv::DFT_INVERSE + cv::DFT_SCALE);
	Mat inverseTransform_save;
	inverseTransform.download(inverseTransform_save);
	imwrite("inverse.png", inverseTransform_save);
}