分类目录归档:CUDA

利用OPENCV和CUDA实现的基于Gabor滤波的曲线检测算法

opencv中有现成的边缘检测和线检测算法,也有对应的gpu实现。但没有曲线检测的算法。下面就实现一个基于Gabor滤波的曲线检测算法,并使用gpu来提高运算速度。算法参考了GitHub上的代码,通过控制Gabor滤波的参数来控制检测的线宽等特征,并使用了FFT来代替卷积从而提升速度。

1.算法来源

算法参考了https://github.com/Po-Ting-lin/HairRemoval里面的代码。

2.算法流程

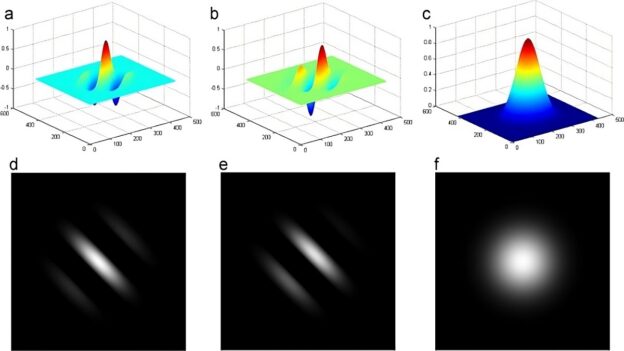
  • 根据预输入的参数,生成Gabor滤波矩阵。不同方向生成的矩阵不一样,最多8个方向。
  • 将各个Gabor滤波矩阵与原图片进行卷积。为了加快运行速度,使用了fft来加速卷积的运算速度
  • 取卷积后的图片各方向的最大值组成最后的结果输出
  • 根据实际进行2值化等处理,输出检测出的曲线

3.代码

头文件 DetectLineCUDA.h 的主要部分。关键是构造函数,输入了Gabor滤波的参数,可以用来调整检测曲线的宽带,长度等。

class DetectLineCUDA
{
public:
    DetectLineCUDA(int cols, int rows, std::vector<int> _angles,int MinArea = 20,float Alpha = 1.15f,float Beta = 0.55f,float HairWidth = 12.0f);
	void detect(cv::cuda::GpuMat& src, cv::cuda::GpuMat& mask);
	~DetectLineCUDA();

private: 
      .............
};

#endif // DETECTLINECUDA_H

类文件 DetectLineCUDA.cpp

  • 构造函数初始化了一些变量
  • detect函数是算法运行的主函数,通过_initGaborFilterCube函数生成滤波矩阵,随后通过一个循环进行快速傅里叶,计算各个方向上的卷积。最后通过_cubeReduction函数合并结果
DetectLineCUDA::DetectLineCUDA(int cols, int rows, std::vector<int> _angles, int MinArea, float Alpha, float Beta, float HairWidth)
{
	Width = cols;
	Height = rows;

    NumberOfFilter = 8;
    this->MinArea = MinArea;
    this->Alpha = Alpha;
    this->Beta = Beta;
    this->HairWidth = HairWidth;

	SigmaX = 8.0f * (sqrt(2.0 * log(2) / CV_PI)) * HairWidth / Alpha / Beta / CV_PI;
	SigmaY = 0.8f * SigmaX;
	KernelRadius = ceil(3.0f * SigmaX);  // sigmaX > sigamY
	KernelW = 2 * KernelRadius + 1;
	KernelH = 2 * KernelRadius + 1;
	KernelX = KernelRadius;
	KernelY = KernelRadius;
	FFTH = snapTransformSize(Height + KernelH - 1);
	FFTW = snapTransformSize(Width + KernelW - 1);

	cufftPlan2d(&_fftPlanFwd, FFTH, FFTW, CUFFT_R2C);
	cufftPlan2d(&_fftPlanInv, FFTH, FFTW, CUFFT_C2R);

    this->angles.insert(this->angles.end(), _angles.begin(), _angles.end());
}

int DetectLineCUDA::snapTransformSize(int dataSize) {
	........
}
........
void DetectLineCUDA::detect(cv::cuda::GpuMat& src, cv::cuda::GpuMat& mask) {
	float* d_PaddedData;
	float* d_Kernel;
	float* d_PaddedKernel;
	float* d_DepthResult;
        ........

	//// init data
	float* h_kernels = _initGaborFilterCube();
    cudaMemcpy(d_Kernel, h_kernels, KernelH * KernelW * NumberOfFilter * sizeof(float), cudaMemcpyHostToDevice);

	cuda::GpuMat src_f;
	if (src.channels() == 3) {
		cuda::GpuMat src_gray;
		src.convertTo(src_gray, CV_32FC3);
		cuda::cvtColor(src_gray, src_f,cv::COLOR_BGR2GRAY);
	}
	else {
		src.convertTo(src_f, CV_32F);
	}

	cuda::GpuMat d_src_c_ptr_mat(src.rows, src.cols, CV_32FC1, d_src_c_ptr);

	cuda::GpuMat pand_mat(FFTH, FFTW, CV_32FC1, d_PaddedData);
	cuda::copyMakeBorder(src_f, d_src_c_ptr_mat, 0, FFTH - src.rows, 0, FFTW - src.cols, BORDER_WRAP);
	d_src_c_ptr_mat.copyTo(pand_mat);

	// FFT data
	cufftExecR2C(_fftPlanFwd, (cufftReal*)d_PaddedData, d_DataSpectrum);
	cudaDeviceSynchronize();

    for (int i = 0; i < angles.size(); i++) {
        int kernel_offset = angles[i] * KernelH * KernelW;
		int data_offset = i * FFTH * FFTW;

		_padKernel(d_PaddedKernel, d_Kernel + kernel_offset);

		cv::cuda::GpuMat raw_dst_mat(FFTH, FFTW, CV_32FC1, d_PaddedKernel);
		cv::Mat cpumat;
		raw_dst_mat.download(cpumat);

		// FFT kernel
        cufftExecR2C(_fftPlanFwd, (cufftReal*)d_PaddedKernel, (cufftComplex*)d_KernelSpectrum);
        cudaDeviceSynchronize();

		//// mul
		_modulateAndNormalize(d_TempSpectrum, d_DataSpectrum, d_KernelSpectrum, 1);
        cufftExecC2R(_fftPlanInv, (cufftComplex*)d_TempSpectrum, (cufftReal*)(&d_DepthResult[data_offset]));
        cudaDeviceSynchronize();


		cv::cuda::GpuMat d_DepthResult_mat(FFTH, FFTW, CV_32FC1, d_DepthResult + data_offset);
		d_DepthResult_mat.download(cpumat);
	}

	_cubeReduction(d_DepthResult, d_Result);

	cuda::GpuMat d_Result_mat(Height , Width,CV_8UC1, d_Result);
	d_Result_mat.copyTo(mask);
.........
}

float* DetectLineCUDA::_initGaborFilterCube() {
	float* output = new float[KernelW * KernelH * NumberOfFilter];
	float* output_ptr = output;
	for (int curNum = 0; curNum < NumberOfFilter; curNum++) {
		float theta = (float)CV_PI / NumberOfFilter * curNum;
		for (int y = -KernelRadius; y < KernelRadius + 1; y++) {
			for (int x = -KernelRadius; x < KernelRadius + 1; x++, output_ptr++) {
				float xx = x;
				float yy = y;
				float xp = xx * cos(theta) + yy * sin(theta);
				float yp = yy * cos(theta) - xx * sin(theta);
				*output_ptr = exp((float)(-CV_PI) * (xp * xp / SigmaX / SigmaX + yp * yp / SigmaY / SigmaY)) * cos((float)CV_2PI * Beta / HairWidth * xp + (float)CV_PI);
			}
		}
	}
	return output;
}

cuda 文件 DetectLinekernel.cu

里面的一些函数可以使用opencv里的函数代替,但感觉意义不大,就直接使用原来的了。

函数调用的方法

        Mat inputmat = imread("test.bmp",cv::IMREAD_GRAYSCALE);
        cv::bitwise_not(inputmat,inputmat);//算法找寻的是黑色的曲线,所以将原始图片取反
        cuda::GpuMat inputgpu;
        inputgpu.upload(inputmat);

        std::vector<int> angles;
        angles.push_back(ANGLE_0);
        angles.push_back(ANGLE_23);
        angles.push_back(ANGLE_45);
        angles.push_back(ANGLE_68);
        angles.push_back(ANGLE_90);
        angles.push_back(ANGLE_113);
        angles.push_back(ANGLE_135);
        angles.push_back(ANGLE_157);
        DetectLineCUDA dl(inputmat.cols, inputmat.rows,angles,20,1.95f,0.85f,8.0f);
        cv::cuda::GpuMat m_g = cuda::createContinuous(inputmat.size(), CV_8UC1);
        dl.detect(inputgpu, m_g);

        Mat m;
        m_g.download(m);
        imwrite("m.bmp", m);// m 就是分析出的曲线,后续可以再进行2值化,去掉一些干扰

算法效果

CUDA + subPixel + EDGE 边缘检测

子像素的边缘检测算法很多,但使用CUDA进行的不是很多。github上可以找到一个带CUDA的子像素边缘检测算法,但经过运行发现有些小bug,其cpu版本正常,但gpu版本找轮廓时会偶发轮廓被切断的问题。一下就对其进行一些修正。当然也许还有其他bug~~

一.源项目位置

源项目位置https://github.com/CsCsongor/subPixelEdgeDetect 。算法基于论文https://www.ipol.im/pub/art/2017/216/

二.代码分析

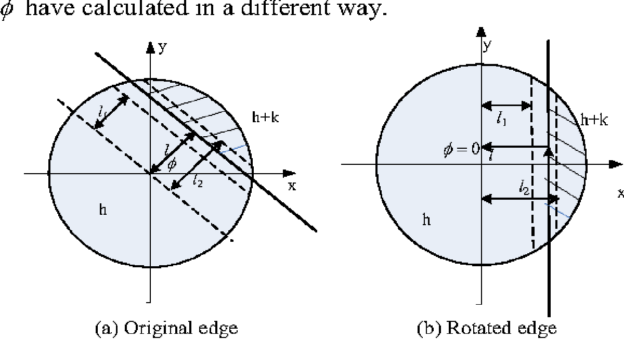
通过分析,主要是因为使用CUDA后,导入了线程。而原有CPU算法是单线程的。在涉及到最优前向轮廓或最优后向轮廓的求解时,会因为多线程,导致没有找到最优轮廓,而保留了2个轮廓信息。
就是源算法中cu_chain_edge_points这个函数里的下面这段代码

if (fwd >= 0 && next[from] != fwd && ((alt = prev[fwd]) < 0 || chain(alt, fwd, Ex, Ey, Gx, Gy, rows, cols) < fwd_s)){
	if (next[from] >= 0){			// Remove previous from-x link if one */
		prev[next[from]] = -1;	// Only prev requires explicit reset  */
	}
	next[from] = fwd;					// Set next of from-fwd link          */
	if (alt >= 0){						// Remove alt-fwd link if one
		next[alt] = -1;					// Only next requires explicit reset
	}
	prev[fwd] = from;					// Set prev of from-fwd link
}
if (bck >= 0 && prev[from] != bck && ((alt = next[bck]) < 0 || chain(alt, bck, Ex, Ey, Gx, Gy, rows, cols) > bck_s)){
		if (alt >= 0){					// Remove bck-alt link if one
			prev[alt] = -1;				// Only prev requires explicit reset
		}
		next[bck] = from;				// Set next of bck-from link
		if (prev[from] >= 0){		// Remove previous x-from link if one
			next[prev[from]] = -1; // Only next requires explicit reset
		}
		prev[from] = bck;				// Set prev of bck-from link
}

而原作者好像也发现了这个问题,在拼接所有轮廓的时候,并没有使用cpu版本里的代码去先找每一个轮廓的起始点,然后再拼接轮廓,而是从任意点开始。这样就会导致轮廓被切断了。
以下list_chained_edge_points 函数中的注释掉的那行代码,就是找轮廓起始点的算法。

// Set k to the beginning of the chain, or to i if closed curve
// for (k = i; (n = prev[k]) >= 0 && n != i; k = n); //这句被注释了,替换成了下面这行
if ((n = prev[i]) >=0 && n != i){ k= n;}

三.算法修改

1.修改cu_chain_edge_points函数。 寻找最优5*5轮廓点的算法屏蔽,先记录下所有向前向后轮廓点

// Chain edge points
__global__
void cu_chain_edge_points(int * next, int * prev, double * Ex,	double * Ey,double * Gx, double * Gy, int rows, int cols){
	int x, y, i , j, alt;
	int dx, dy, to;

	x = blockIdx.x*blockDim.x+threadIdx.x+2;
	y = blockIdx.y*blockDim.y+threadIdx.y+2;

	// Try each point to make local chains
	// 2 pixel margin to include the tested neighbors
	if (x < (rows-2) && y < (cols-2)){
		// Must be an edge point
		if (Ex[x + y*rows] >= 0.0 && Ey[x + y*rows] >= 0.0){
			int from = x + y*rows;  // Edge point to be chained
			double fwd_s = 0.0;  	  // Score of best forward chaining
			double bck_s = 0.0;     // Score of best backward chaining
			int fwd = -1;           // Edge point of best forward chaining
			int bck = -1;           // Edge point of best backward chaining

			/* try all neighbors two pixels apart or less.
				looking for candidates for chaining two pixels apart, in most such cases,
				is enough to obtain good chains of edge points that	accurately describes the edge.
			*/
			for (i = -2; i <= 2; i++){
				for (j = -2; j <= 2; j++){
					to = x + i + (y + j)*rows; // Candidate edge point to be chained

					double s = chain(from, to, Ex, Ey, Gx, Gy, rows, cols);  //score from-to

					if (s > fwd_s){ // A better forward chaining found
						fwd_s = s;
						fwd = to;
					} else if (s < bck_s){ // A better backward chaining found
						bck_s = s;
						bck = to;
					}
				}
			}

            if (fwd >= 0){
                next[from] = fwd;					// Set next of from-fwd link
            }
            if (bck >= 0){
                prev[from] = bck;				// Set prev of bck-from link
            }

//			if (fwd >= 0 && next[from] != fwd && ((alt = prev[fwd]) < 0 || chain(alt, fwd, Ex, Ey, Gx, Gy, rows, cols) < fwd_s)){
//				if (next[from] >= 0){			// Remove previous from-x link if one */
//					prev[next[from]] = -1;	// Only prev requires explicit reset  */
//				}
//				next[from] = fwd;					// Set next of from-fwd link          */
//				if (alt >= 0){						// Remove alt-fwd link if one
//					next[alt] = -1;					// Only next requires explicit reset
//				}
//				prev[fwd] = from;					// Set prev of from-fwd link
//			}
//			if (bck >= 0 && prev[from] != bck && ((alt = next[bck]) < 0 || chain(alt, bck, Ex, Ey, Gx, Gy, rows, cols) > bck_s)){
//					if (alt >= 0){					// Remove bck-alt link if one
//						prev[alt] = -1;				// Only prev requires explicit reset
//					}
//					next[bck] = from;				// Set next of bck-from link
//					if (prev[from] >= 0){		// Remove previous x-from link if one
//						next[prev[from]] = -1; // Only next requires explicit reset
//					}
//					prev[from] = bck;				// Set prev of bck-from link
//			}
		}
	}
}

2.增加一个cu_cut_edge_points函数来完成单点最后向前向后轮廓的选择,切掉不是最优的轮廓

__global__
void cu_cut_edge_points(int * next, int * prev, double * Ex,	double * Ey,double * Gx, double * Gy, int rows, int cols){
    int x, y, i , j, alt;
    int dx, dy, to;

    x = blockIdx.x*blockDim.x+threadIdx.x+2;
    y = blockIdx.y*blockDim.y+threadIdx.y+2;

    if (x < (rows-2) && y < (cols-2)){
        if (Ex[x + y*rows] >= 0.0 && Ey[x + y*rows] >= 0.0){
            int center = x + y*rows;
            int temp_next = -1;
            int temp_prev = -1;

            if (x < (rows-2) && y < (cols-2)){
                for (i = -2; i <= 2; i++){
                    for (j = -2; j <= 2; j++){
                        to = x + i + (y + j)*rows;
                        if(next[to] == center){
                            if(temp_next >= 0){
                                if(chain(center, to, Ex, Ey, Gx, Gy, rows, cols) > chain(center, temp_next, Ex, Ey, Gx, Gy, rows, cols)){
                                    next[temp_next] = -1;
                                    temp_next = to;
                                } else {
                                    next[to] = -1;
                                }
                            } else {
                                temp_next = to;
                            }
                        }

                        if(prev[to] == center){
                            if(temp_prev >= 0){
                                if(chain(center, to, Ex, Ey, Gx, Gy, rows, cols) < chain(center, temp_prev, Ex, Ey, Gx, Gy, rows, cols)){
                                    prev[temp_prev] = -1;
                                    temp_prev = to;
                                } else {
                                    prev[to] = -1;
                                }
                            } else {
                                temp_prev = to;
                            }
                        }
                    }
                }
            }
        }
    }
}

3.修改cu_thresholds_remove函数,删掉一些错误的轮廓

__global__
void cu_thresholds_remove(int * next, int * prev,int rows, int cols, int * valid){
	int x, y;

	x = blockIdx.x*blockDim.x+threadIdx.x;
	y = blockIdx.y*blockDim.y+threadIdx.y;
	int idx = x+y*rows;

	if (idx < rows*cols){
		if ((prev[idx] >= 0 || next[idx] >= 0) && !valid[idx]){
			prev[idx] = next[idx] = -1;
		}

        if(prev[idx] != -1 && next[prev[idx]] != idx){
            prev[idx] = -1;
        }
        if(next[idx] != -1 && prev[next[idx]] != idx){
            next[idx] = -1;
        }
	}
}

4.修改list_chained_edge_points函数,重新启用找寻轮廓起始点的代码

// Set k to the beginning of the chain, or to i if closed curve
for (k = i; (n = prev[k]) >= 0 && n != i; k = n);
//if ((n = prev[i]) >=0 && n != i){ k= n;}

5.修改devernay函数,增加刚才添加的函数

cu_chain_edge_points<<<numberOfBlocks, threadsPerBlock, threadsPerBlock.x*threadsPerBlock.y*sizeof(uchar), stream>>>(next, prev, Ex, Ey, Gx, Gy, rows, cols);
cudaDeviceSynchronize();
cu_cut_edge_points<<<numberOfBlocks, threadsPerBlock, threadsPerBlock.x*threadsPerBlock.y*sizeof(uchar), stream>>>(next, prev, Ex, Ey, Gx, Gy, rows, cols);
cudaDeviceSynchronize();
cu_thresholds_with_hysteresis<<<numberOfBlocks, threadsPerBlock, threadsPerBlock.x*threadsPerBlock.y*sizeof(uchar), stream>>>(next, prev, modG, rows, cols, th_high, th_low, valid);
cudaDeviceSynchronize();

完整的代码请下载 subPixelGPU.zip
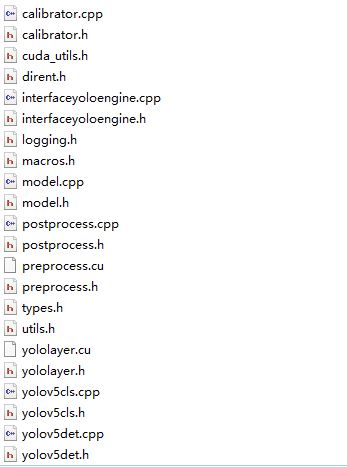
Opencv Inpaint use CUDA Backend

opencv只有cpu接口的Inpaint函数,对于需要使用CUDA进行图片处理时,反复内存显存迁移数据会影响计算速度。在不考虑填充效果十分好的情况下,可以使用如下CUDA算法,简单的进行填充。

算法来源

算法主要参考了https://github.com/Po-Ting-lin/HairRemoval.git 中的填充代码。该项目主要是去除皮肤上的毛发。对于其如何寻找需要填充的区域就不讨论了,直接使用其分析出的mask图进行填充。

该填充算法对细线和小面积的填充效果还可以 大面积的 效果就很一般了

继续阅读